Contents
For installers
Installing Wall mount
Installing Speakers
Installing Bluetooth Amplifier
For users
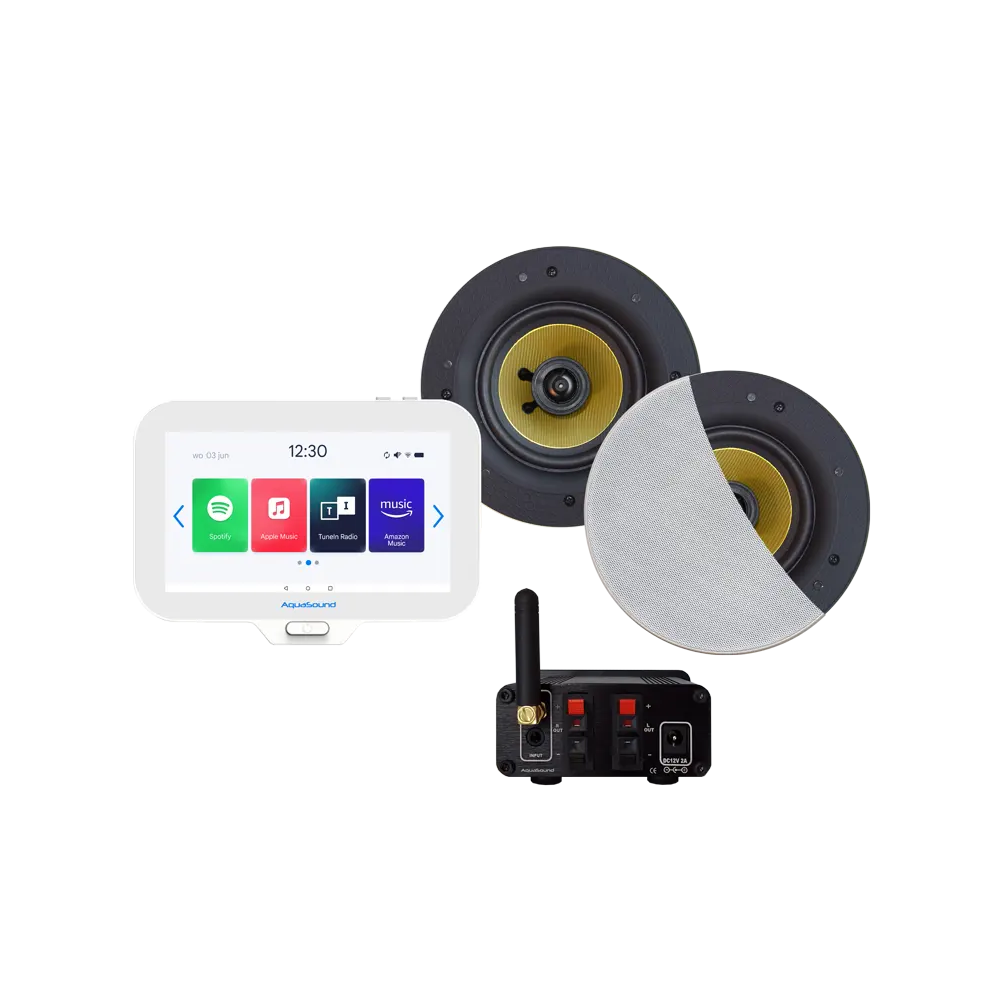
Parts overview
The parts included differ depending on the type of audio system. All N-Joy Audio Systems come with the N-Joy Controller. In some sets, for example, the speakers and/or WiFi audio amplifier are not included.
N-Joy Controller
- N-Joy Controller
- USB charging cable 300 cm
- USB Data cable 125 cm
- USB Adaptor
- Wall mount
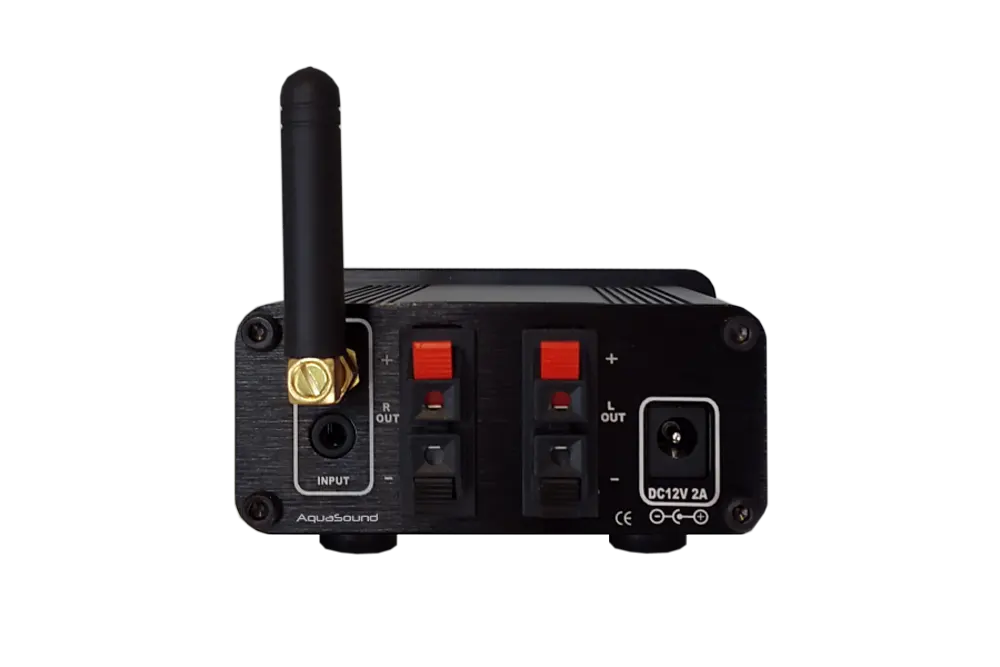
Bluetooth Amplifier
- BMN Type Bluetooth Amplifier
- DC Adaptor
- Antenna
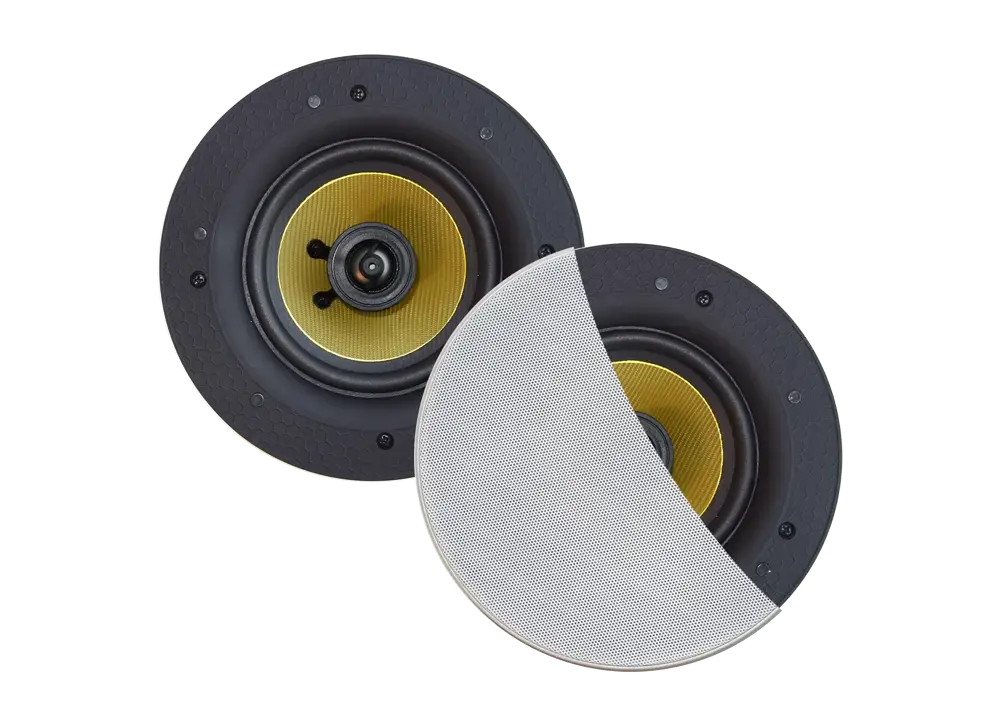
Speaker set
- Rumba, Samba, Zumba or Twist Speakers
- Speaker wire
- Speaker template hole size
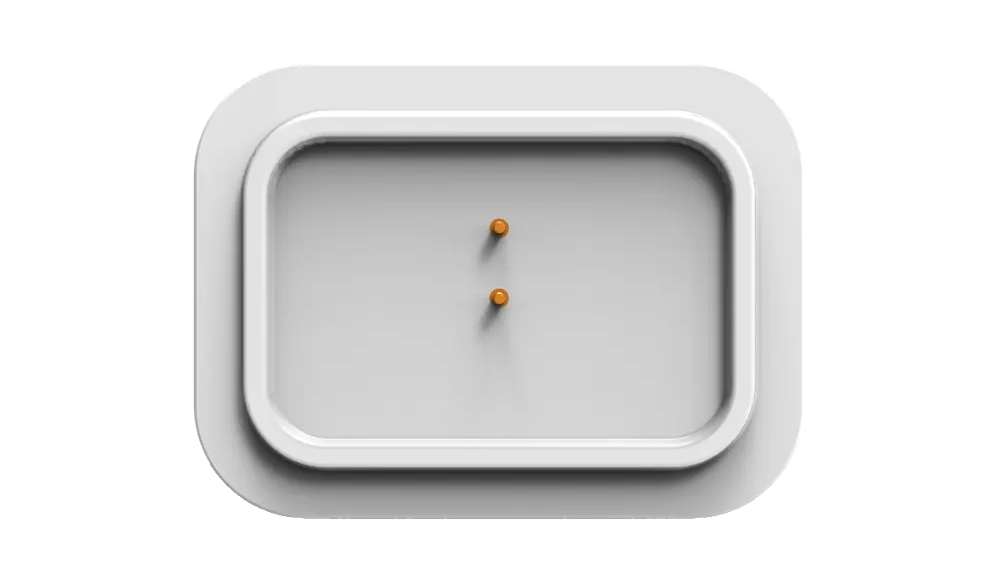
Installing Wall mount
The wall molder is also the charger for the N-Joy Controller. The wall mount should be placed in a strategic location – one with good WiFi reception.
CAUTION! A good WiFi signal an absolute must for a good listening experience. Install a WiFi access point near the N-Joy Controller or get advice from your provider. 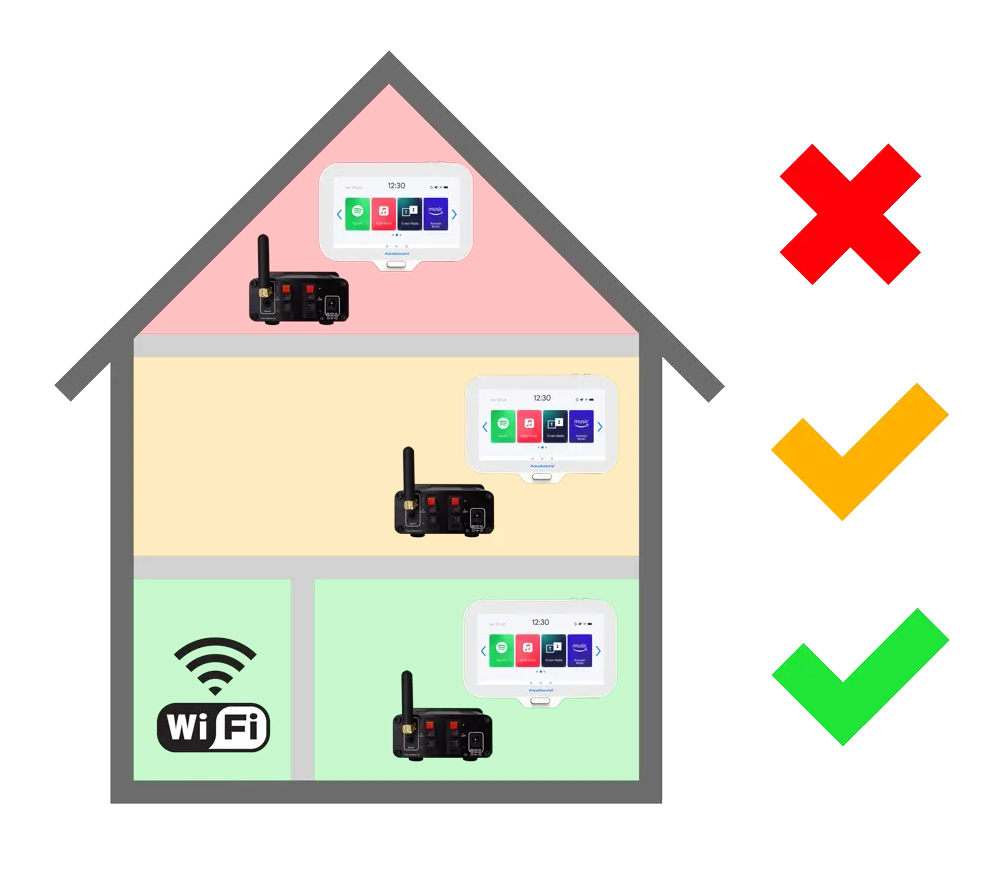
There are two ways to power the wall mount.
A. Installation: with supplied USB adaptor and the 300 cm USB charging cable (recommended)
The best way to integrate the wall mount beautifully into the bathroom.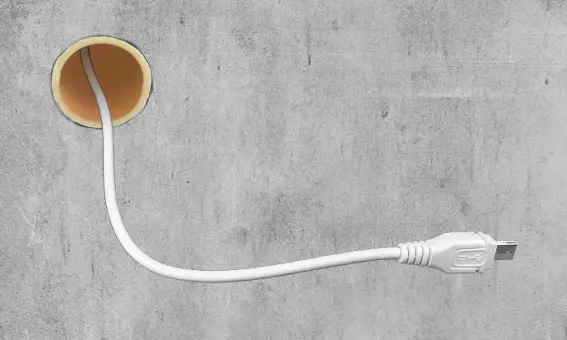
- Run a 16 mm or 5/8 inch electrical conduit through the place where you wish to install the wall mount. This can be done by using a bend, just as when installing a thermostat. Through this tube you can lead the USB cable to a wall socket, for example behind the ceiling or in another room. The length of this tube may not exceed 250 cm.
- Plug the supplied adapter into the wall socket and connect the USB cable to it. Connect the Micro-USB to the back of the wall mount.
- Make sure that the surface where you want to place the wall bracket is clean, dry and free of grease. Remove the protective film from the adhesive strip on the back of the wall mount. Place the wall mount and press firmly for 5 seconds. The wall mount is now fixed and ready for use.
TIP! Before attaching the wall mount to the wall, please make sure that the wall mount provides the controller with power. The wall mount is not easily removed.
B. Mounting: With supplied USB adaptor and 300 cm USB charging cable
The USB cable remains in view with this assembly method.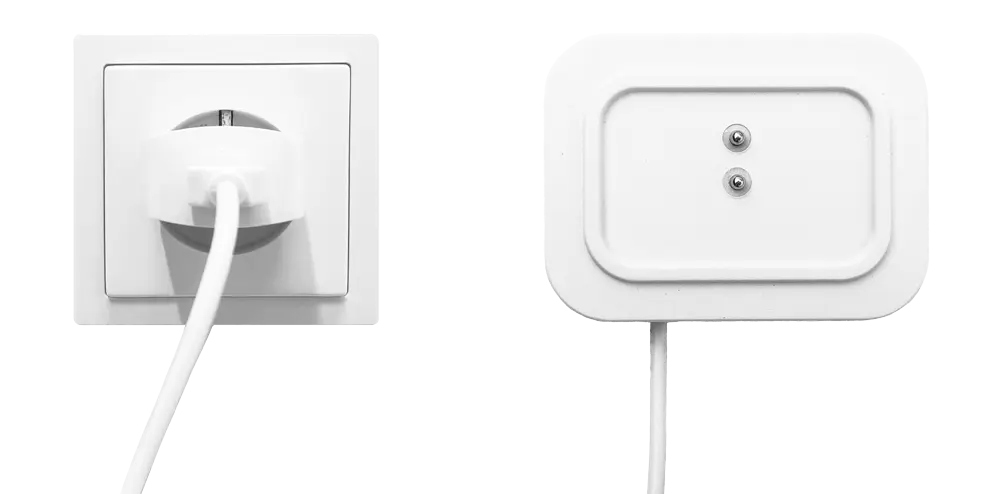
- Connect the Micro-USB to the back of the wall mount. Plug the supplied adapter into the wall socket and connect the USB cable to it.
- Make sure that the surface where you want to place the wall bracket is clean, dry and free of grease. Remove the protective film from the adhesive strip on the back of the wall mount. Place the wall mount and press firmly for 5 seconds. The wall mount is now fixed and ready for use.
TIP! Before attaching the wall mount to the wall, please make sure that the wall mount provides the controller with power. The wall mount is not easily removed.
Installing Speakers
This is followed by the installation of the speakers. There are a few important points to bear in mind when installing a WiFi audio speakers.
- Make sure that the speaker has enough space behind the ceiling.
- The Bluetooth amplifier is placed behind the ceiling.
- A good Bluetooth reception must be present.
- If there is no good Bluetooth reception behind the ceiling, you can use the Bluetooth antenna extension set.
- An electrical outlet must be present behind the ceiling.
When these requirements are met, the speakers can be installed in the ceiling without any problems.
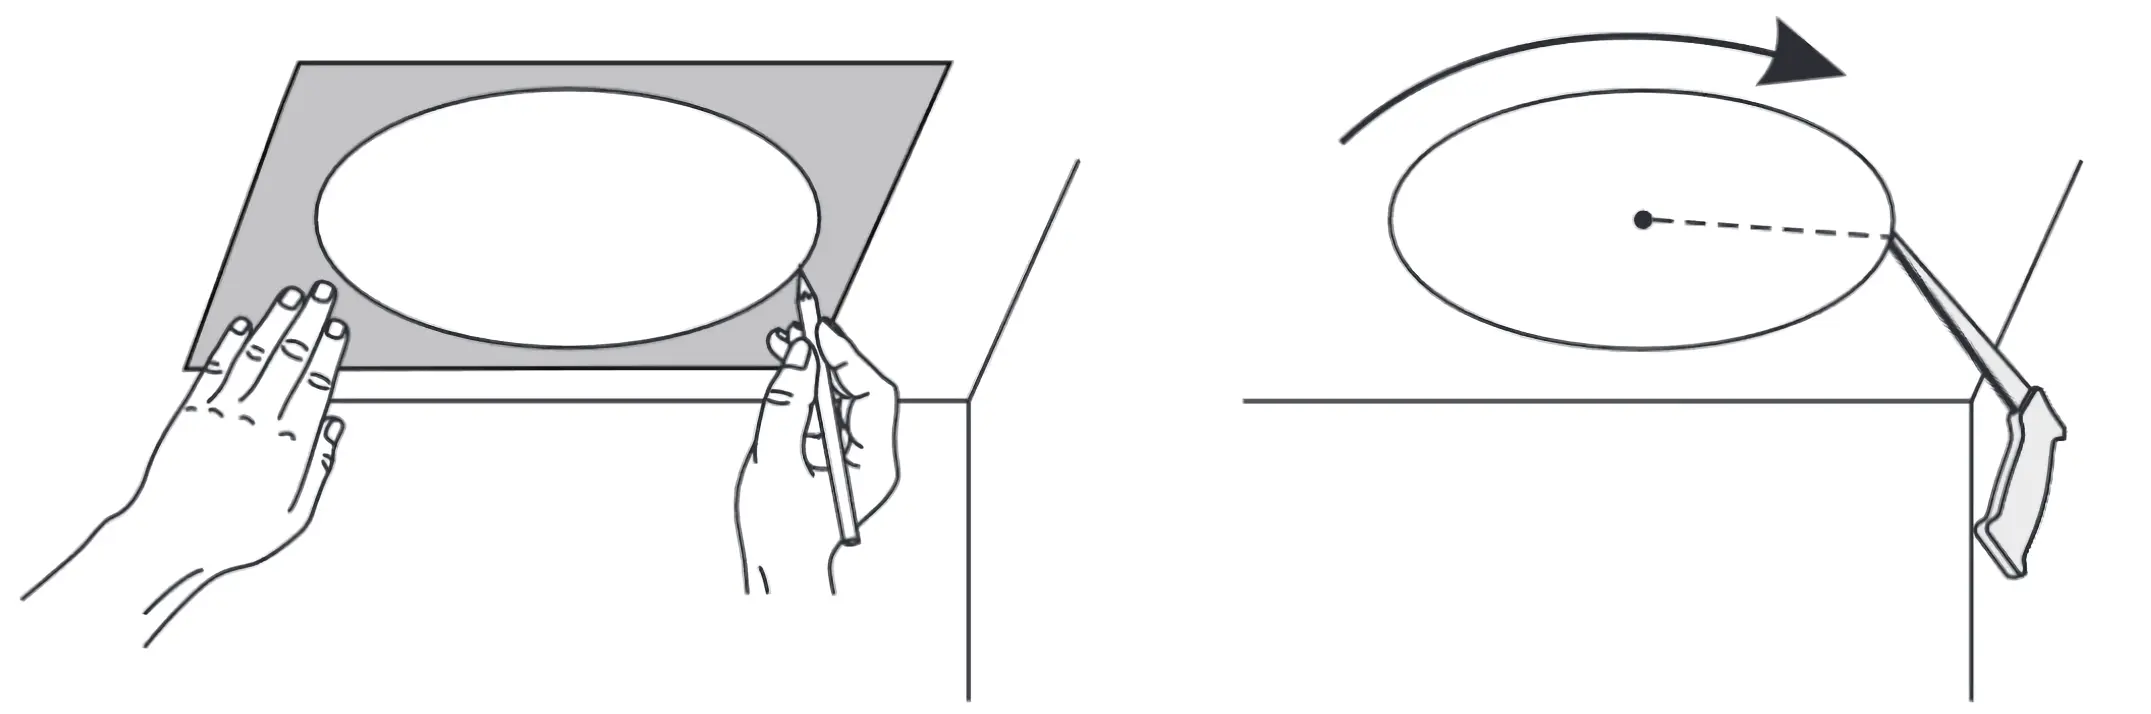
- Use the template to determine the hole in the ceiling and saw/cut it out.
- 2. Before installing the speaker, connect the Bluetooth amplifier and place it through the speaker hole on top of the ceiling. See next section for details.
- Connect the speaker wire to the speaker.
- Place the speaker.
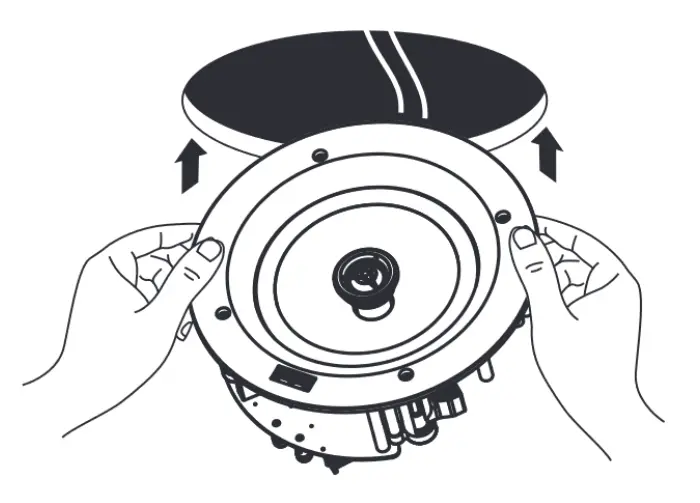
Rumba and Twist speakers
The speakers are equipped with a clamping system. Open the clamps and put them through the hole. The speaker will lock itself in place.
Samba and Zumba speakers
Place the speaker in the hole. Using a screwdriver, tighten the 4 screws. This will open up the hooks on the back and secure the speaker in place.
CAUTION! Use a screwdriver, not a screw machine.
Installing Bluetooth Amplifier
The Bluetooth amplifier is usually placed on top of the ceiling. Because of this, there are a few important points that need to be taken into account.
- A good Bluetooth reception must be present.
- If there is no good Bluetooth reception behind the ceiling, you can use the Bluetooth antenna extension set.
- An electrical outlet must be present behind the ceiling.
Below, we describe the step-by-step plan for connecting the cables to the amplifier.
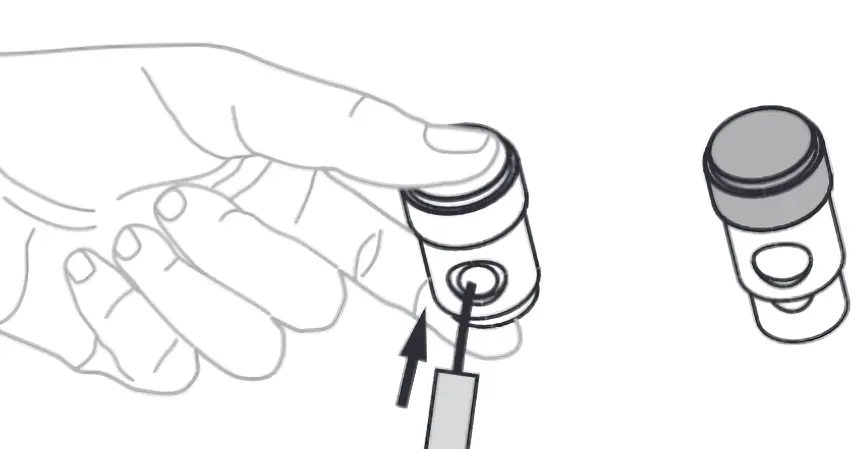
1. Cut the speaker cable to size and strip the ends.
2. Connect this to the amplifier. Red in plus (+), black in minus (-).
3. Screw the antenna on.
4. If an AquaSound TV is present, it can now be connected to the INPUT.
5. Connect the adapter and plug it into the mains.
Adjust the volume knob on the front of the amplifier to a level where you still have a pleasant listening experience at maximum volume. This is not 100 per cent, but rather 60 or 70 per cent. The easiest way to do this is to pair the controller with the amplifier via Bluetooth and play the sound at maximum volume. Now turn the volume knob back to a level where the sound is comfortable to listen to.
After this, the Bluetooth amplifier can be placed on top of the ceiling through the speaker hole.
Set up for use
The connection of the Bluetooth amplifier to the N-Joy Controller is easy to set up. Follow the steps in the N-Joy Controller.
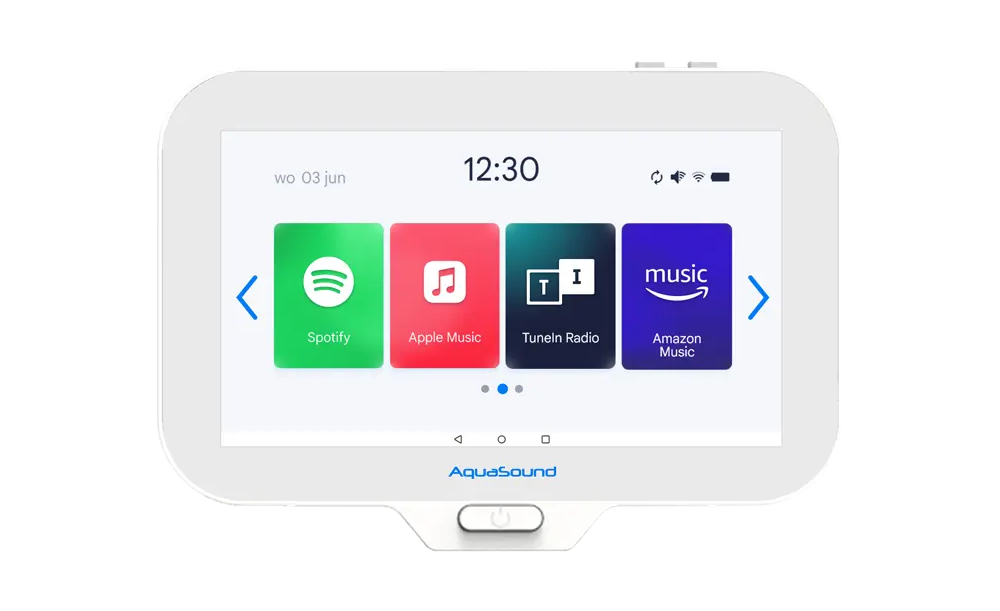
When the N-Joy Controller has gone through its first-time installation, you can choose which streaming services to install. Some services require a subscription.
TuneIn Radio
The world’s most used online radio. Choose from thousands of radio stations. A subscription is not required for this service.

Spotify
Millions of songs at your fingertips for hours of entertainment.
Apple Music
Apple Music gives artists a global stage and the tools to create music, so you can listen to it easily.

Deezer
Deezer is a music streaming service which gives you access to more than 90 million tracks worldwide and other audio content such as podcasts.

Tidal
Global streaming service with millions of songs and original content.
Shuttle Player
MP3 files stored in the controller come to life with the Shuttle Player.
Lastly
Your N-Joy bathroom radio is therefore ready for hours of listening pleasure! In the unlikely event that you encounter problems that cannot be solved with this manual, please do not hesitate to contact us.
If you are satisfied with our products, we would like to invite you to leave a review on Google. Press here to go to the review page.
As a thank you for your review, every month we raffle off a free waterproof AquaSound Sound-Bar worth €299 among the best entries!